Play Training
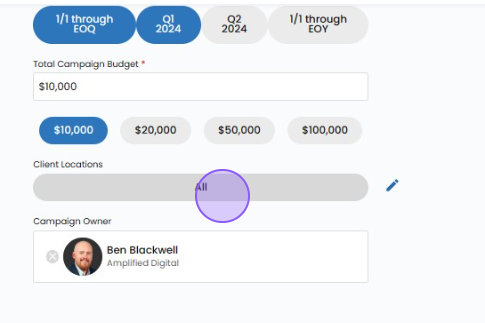
Set Locations For Campaign
Number of Guide Steps: 3
Leveraging the Client Locations feature on the campaign creation screen in Vision VX offers a dynamic way to configure multiple client locations, and even strategically incorporate competitor locations for effective geo-fencing.
Here's a step-by-step guide to seamlessly add and manage multiple locations:

- 1. Initiate Adding Multiple Locations
- 2. Business Name Input
- 3. Repeat for Multiple Locations
Initiate Adding Multiple Locations.
Locate the "Add Location" grey button on the campaign creation screen. This is your gateway to incorporating multiple client locations, including those of competitors that can be strategically utilized for geo-fencing purposes.
Upon clicking the "Add Location" button, a new field will appear. Start typing the name of the business you wish to include as a campaign location. This could be your client's business, a competitor, or any other relevant business location you want to target.


Business Name Input.
As you type the business name, Vision VX will provide suggestions and auto-complete options based on the information available.
This ensures accuracy and helps you quickly select the desired business location for inclusion in your campaign.

Repeat for Multiple Locations.
If your campaign targets multiple locations, repeat the process by clicking the "Add Location" button for each additional business you want to include. This flexibility allows you to tailor your campaign to a diverse set of locations, ensuring a comprehensive and targeted approach.
Particularly noteworthy is the ability to strategically incorporate competitor locations. By including competitor businesses, you can implement effective geo-fencing strategies, optimizing your campaign to reach audiences in close proximity to competitors.
By adeptly utilizing the Client Locations feature, you empower your campaigns with geographic precision and strategic targeting, creating a powerful toolset for reaching specific audiences and optimizing your marketing efforts for maximum impact.