Play Training
Create A New Client
Number of Guide Steps: 12
Creating a new client in Vision VX is a straightforward process designed to help you efficiently manage your client information.

- 1. Access MyWorkspace
- 2. Navigate to Clients Tab
- 3. Add a New Client:
- 4. Input Client Name
- 5. Select from Search Results
- 6. Client Not Found?
- 7. Client Profile
- 8. Client Industry and Category
- 9. Logo Selection
- 10. Assign Owner
- 11. Business Location
- 12. Finalization
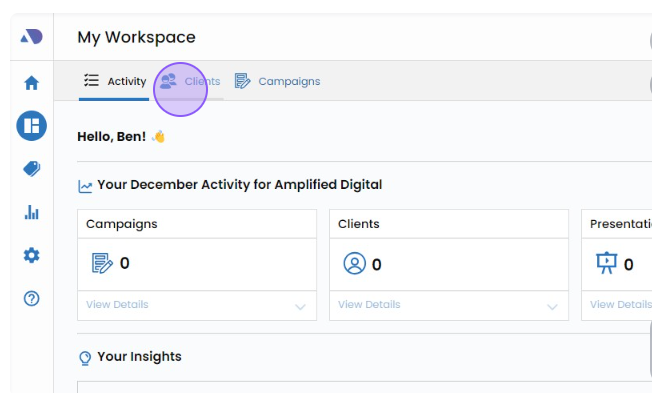
Access MyWorkspace.
To begin, navigate to the Vision VX platform and click on the "MyWorkspace" icon located in the left navigation bar. This action will take you to your workspace, where you can manage your clients.
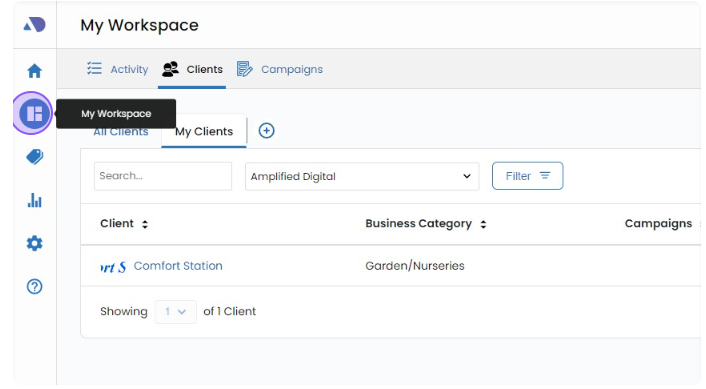

Navigate to Clients Tab.
Within MyWorkspace, you'll find a "Clients" tab. Click on it to access a list of all the clients you've previously created or imported into Vision.

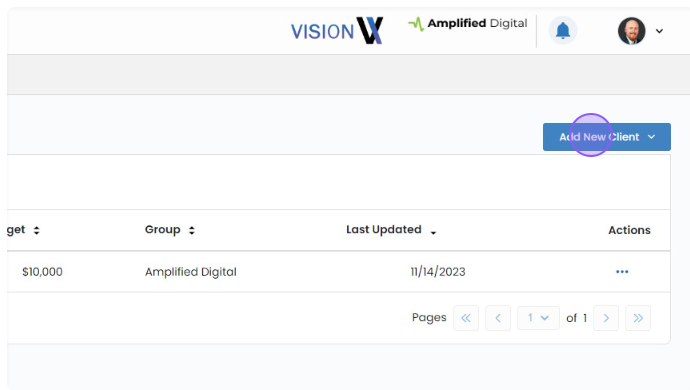
Add a New Client:.
If you wish to create a new client, click the "Add New Client" button. This action will initiate the client creation process.

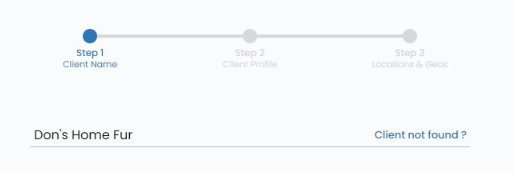
Input Client Name.
You will now be prompted to enter the client's name. Start typing the business name you want to add as a client.
Optionally, you can include a city or state to narrow down your search. Vision will search online sources to provide you with relevant client information, including the website, logo, and address.

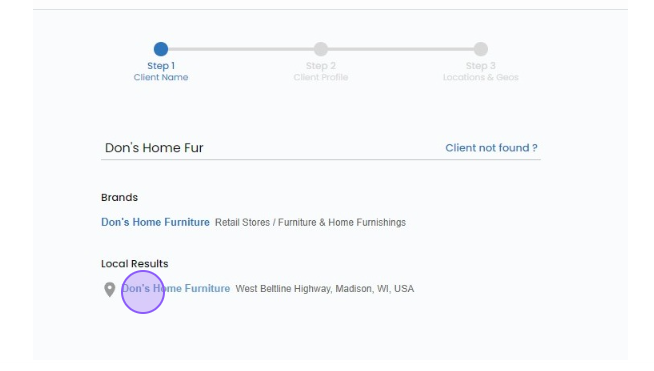
Select from Search Results.
When a list of local search results is displayed, choose the most appropriate option that matches your client.
Vision will automatically populate the client information with the data found online.

Client Not Found?.
If, after multiple searches, you're unable to locate your client, you have the option to click on the "Client Not Found" link.
This allows you to manually input the client's information.
However, it's recommended to use this option as a last resort after conducting multiple searches.


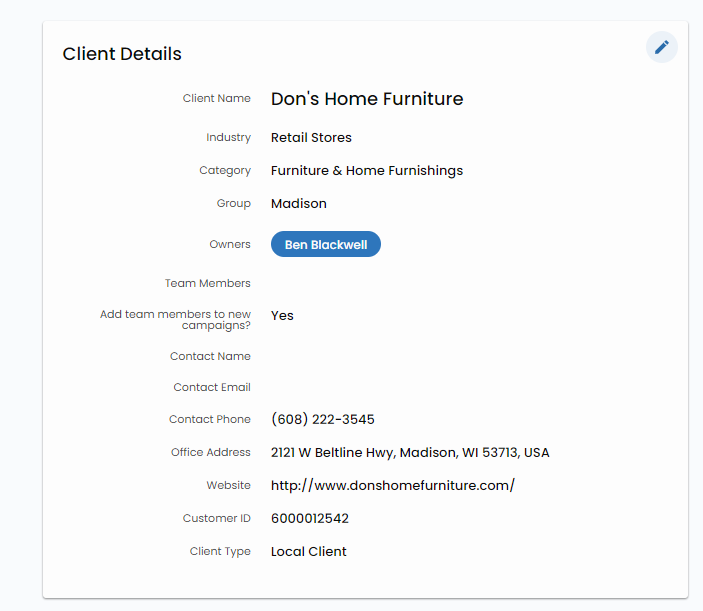
Client Profile.
After confirming the client's name, you'll be prompted to confirm additional client details.

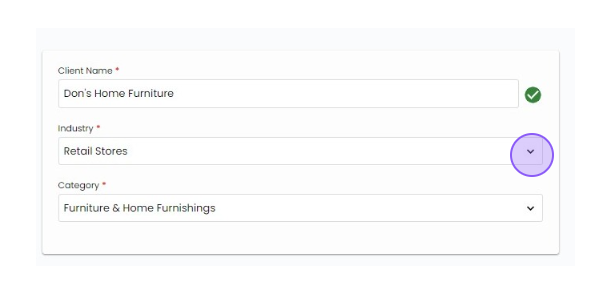
Client Industry and Category.
Start by selecting the appropriate industry for your client. Then you choose the correct Category from the provided list.

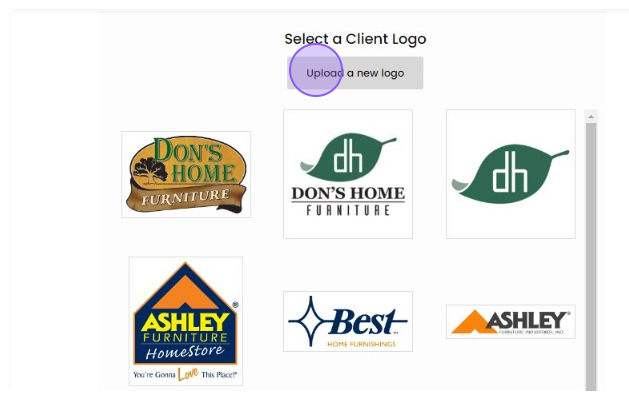
Logo Selection.
Next, select a logo from the provided list on the right-hand corner of the screen.
If the desired logo is not available in the list, you have the option to upload a custom logo using the "Upload" button.

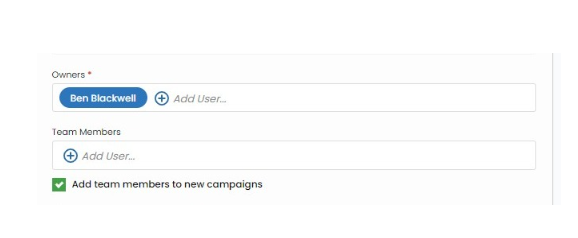
Assign Owner.
Finally, confirm the client's owner, typically the sales representative responsible for this client.
After verifying these details, click "Next" to proceed.

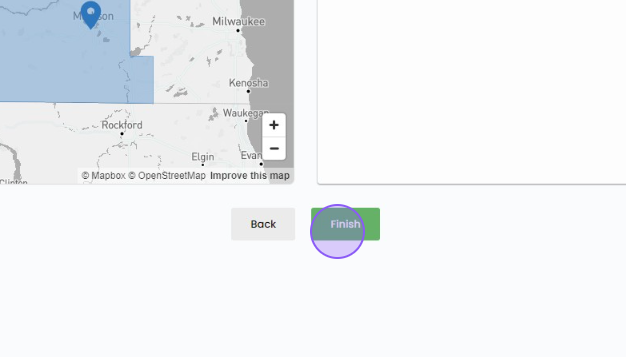
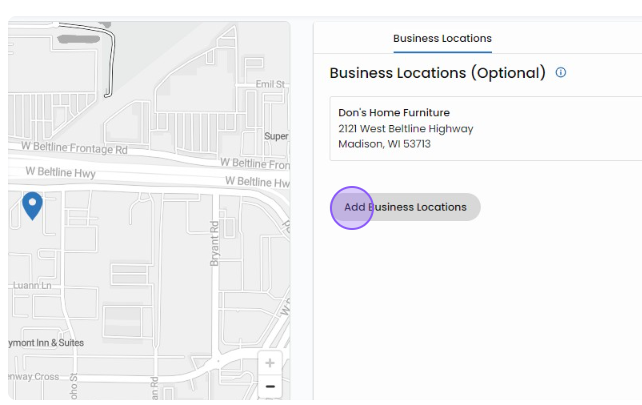
Business Location.
If your client has multiple business locations, the final screen will prompt you to add these locations.
You can do this by clicking the "Add Business Locations" button.

Finalization.
Once you are satisfied with your location selections and client details, click the "Finish" button. This action completes the process of creating a new client in Vision VX.