Play Training
Filtering to Your Client
Number of Guide Steps: 7
Tailoring your TapClicks experience to focus on a specific client is a simple yet powerful feature. Here's a step-by-step guide on how to seamlessly filter TapClicks to display data exclusively for your desired client:

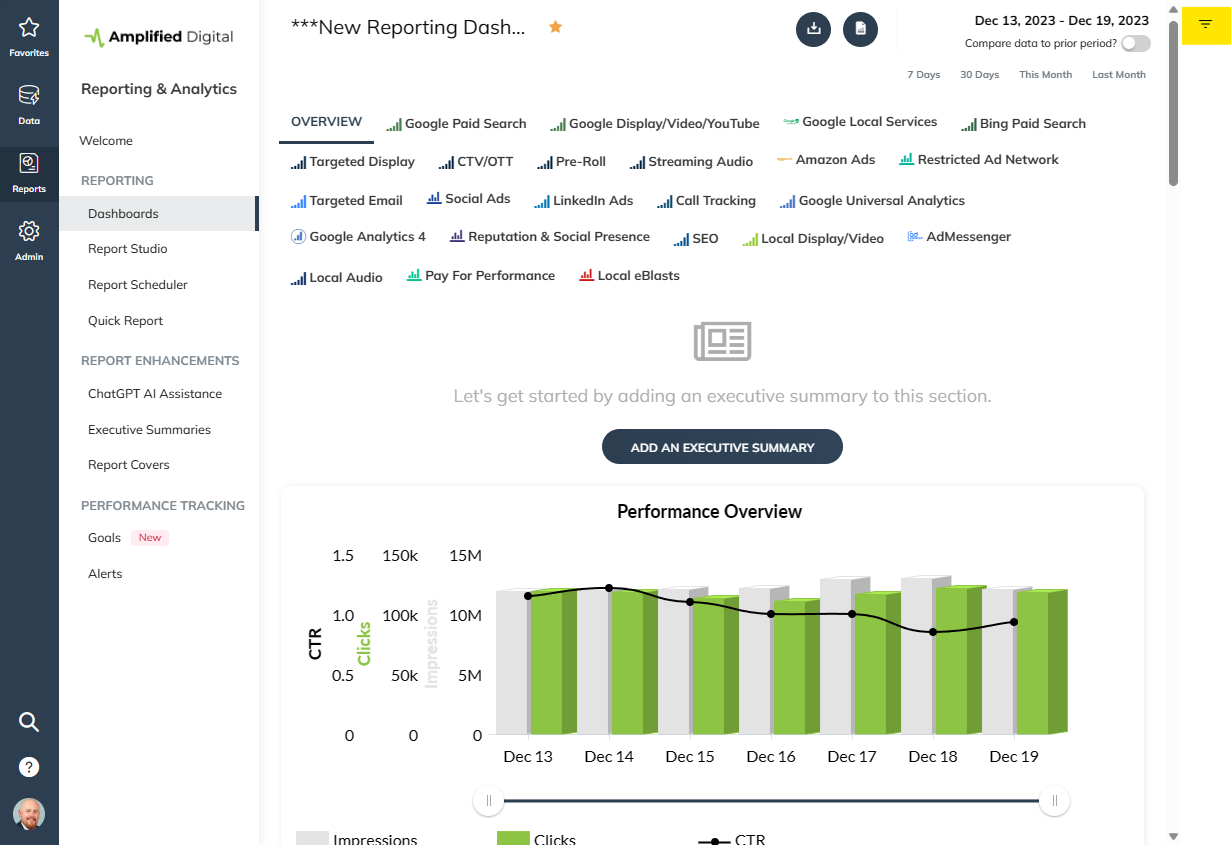
- 1. Locate the Filter Icon
- 2. Access the Client Filter Box
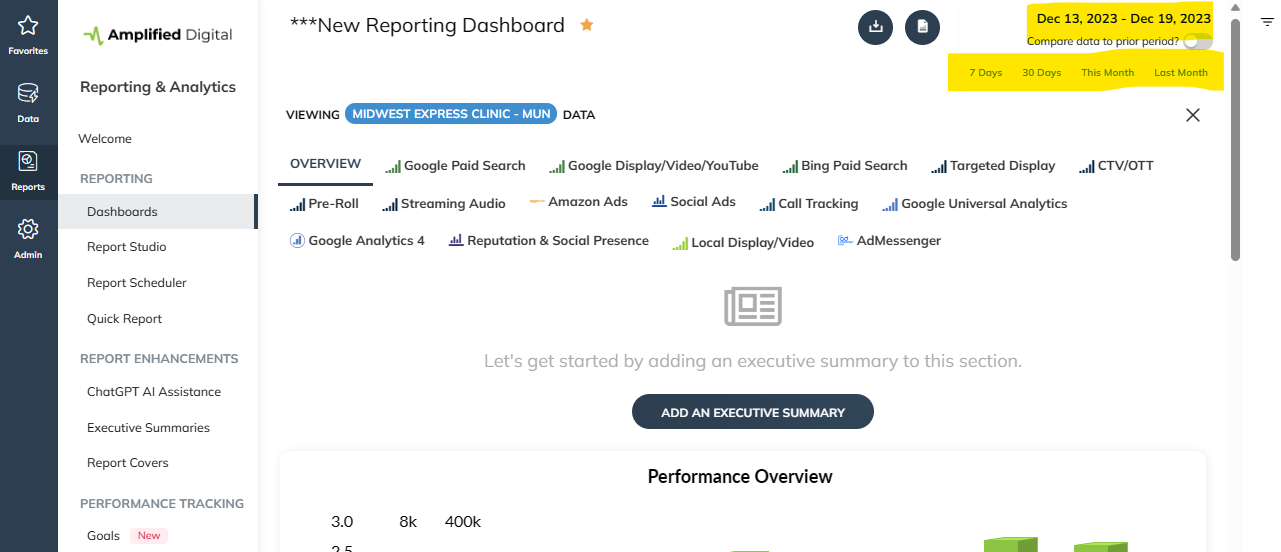
- 3. Type Client Name
- 4. Select Client and Click Apply
- 5. Page Reloads with Client Data
- 6. Choose Reporting Time Period
- 7. Apply Date Range for Dashboard Update
Locate the Filter Icon.
On the TapClicks dashboard, look for the filter icon situated in the upper right corner of the page. This icon typically resembles a funnel or filter symbol.

Access the Client Filter Box.
Click on the filter icon to open the filtering options. Look for the client filter box within the filtering panel.


Type Client Name.
Start typing the name of the client you wish to focus on in the client filter box. As you type, the system will provide suggestions based on your input.


Select Client and Click Apply.
Once your desired client's name appears in the suggestions, click on it to select. After selecting the client, click the "Apply" button to activate the filter.


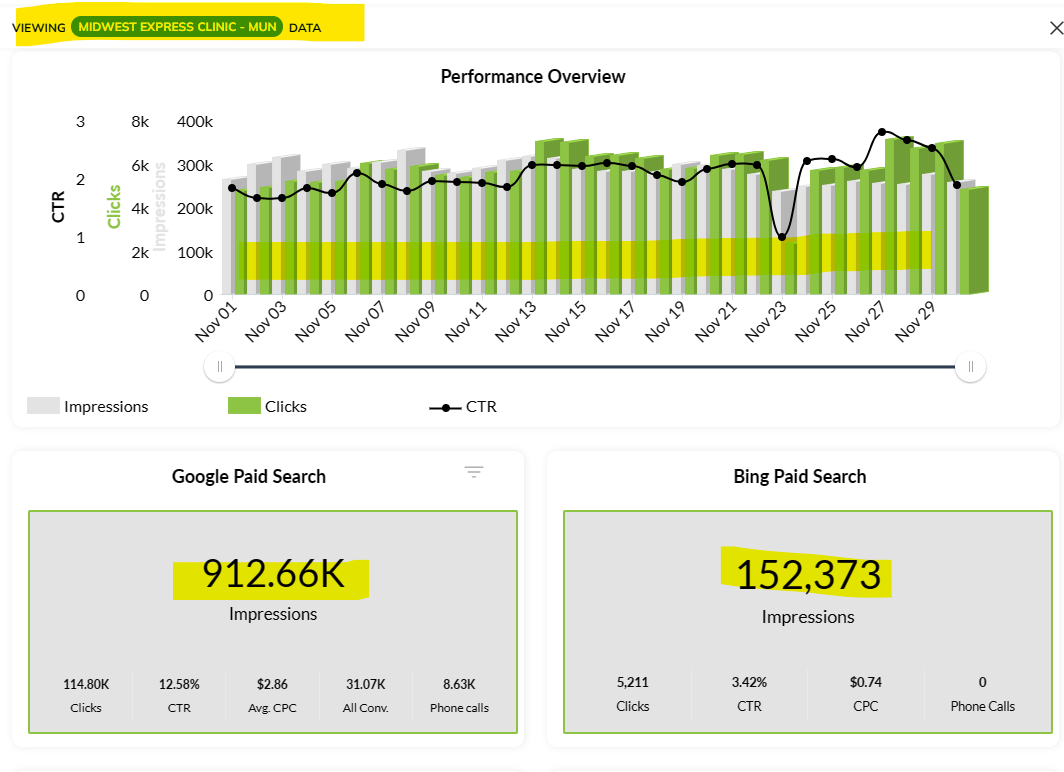
Page Reloads with Client Data.
The page will now reload, displaying data exclusively for the selected client. You can explore various services that the client is availing from your organization, seamlessly integrated into TapClicks.


Choose Reporting Time Period.
Utilize the controls at the top of the screen to set a specific reporting time period. This allows you to narrow down the data to a particular timeframe.

Apply Date Range for Dashboard Update.
After selecting the reporting time period, click "Apply." The TapClicks dashboard will dynamically update to showcase data relevant to the chosen client within the specified timeframe.

Congratulations, you've reached the end of this playbook.
Be sure to review all the courses and guides in this playbook to ennsure that you've reviewed all the material.A check mark next to each item will inform you if have reviewed or not.